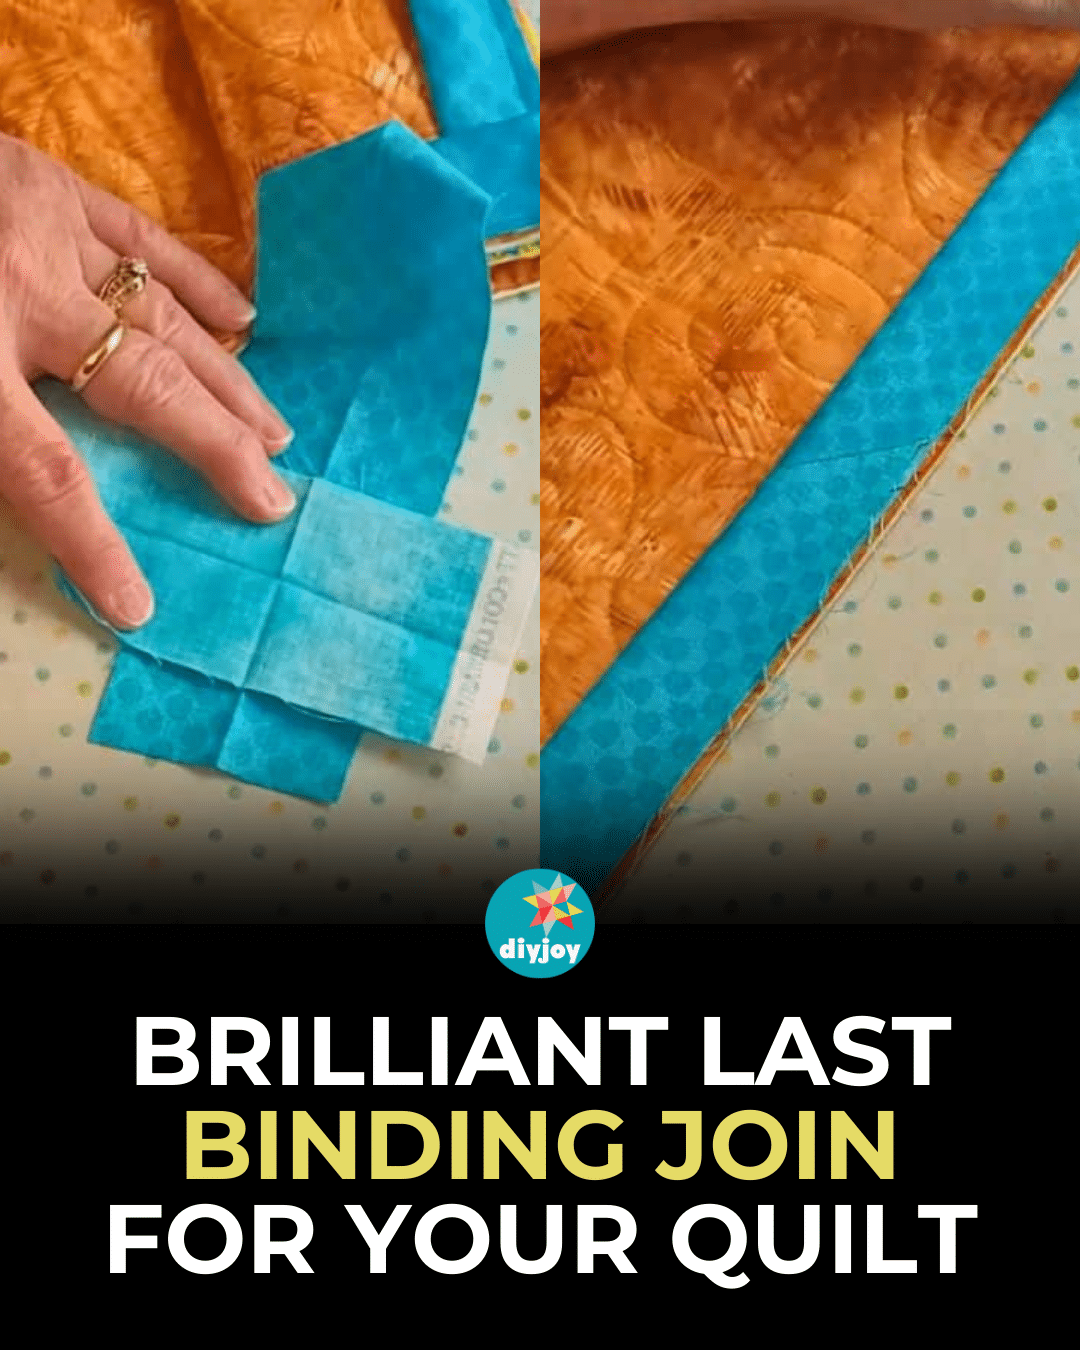
This is definitely a brilliant last binding join for your quilt.
I never knew about this technique until I stumbled acrossMerryMabelMarkets tutorial on YouTube.
It was easy to follow, and it turned out flat and perfect.
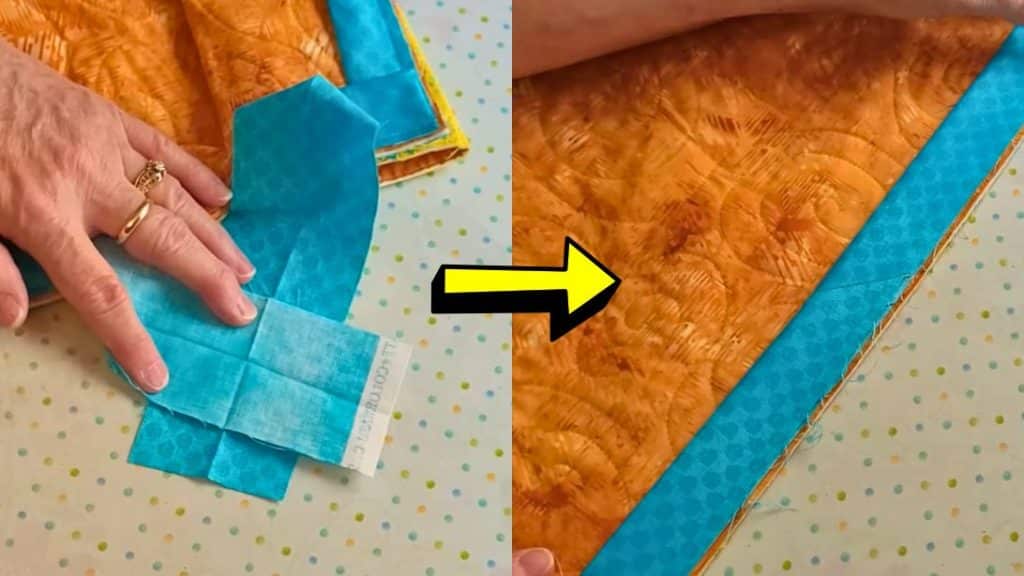
Image by MerryMabelMarket via Youtube
It looks like it doesnt even end anywhere!
Keep on reading or watch the video below for full instructions.
Get rid of the excess of your backing.
Now put the bottom binding over the top of the other binding and line up the X across.
The lines should match each other.
Dont flip or turn, just open it up straight.
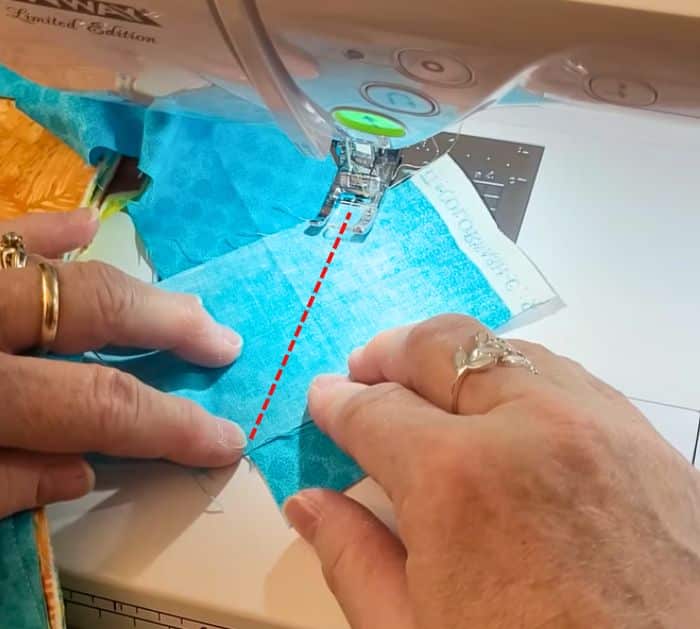
Step 3:
Take it to the sewing machine and test whether the lines are still aligned.
ensure nothing is twisted.
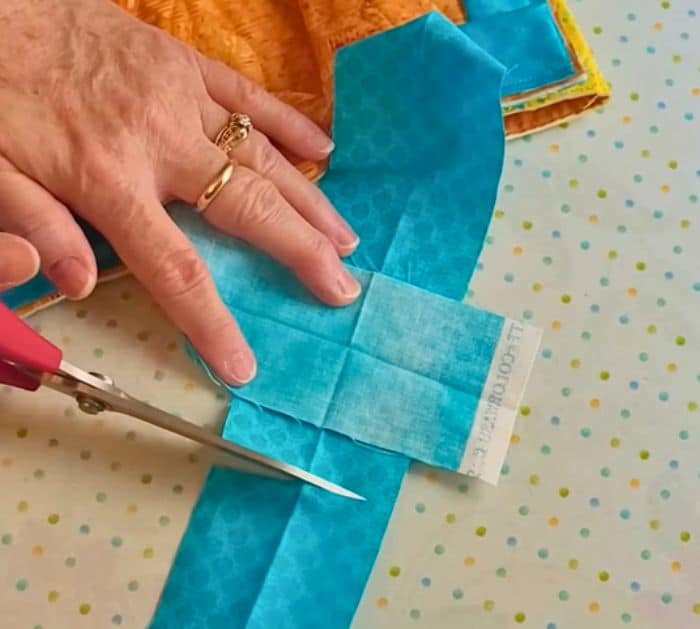
Open it up and see if its perfect.
If its looking great, take your scissors and trim the excess.
Press the seams open and fold the binding.
As you bind, be sure not to pull or distort anything.
Did you like this simple technique?
She has tons of amazing video tutorials for you.
