You probably know thedisappearing four-patch, but have you heard of the disappearing four patch weave?
It looks like a difficult pattern at first glance, but its actually easy to make.
Im sure youll be surprised by how simple the steps are!

Image by Missouri Star via YouTube
As the title suggests, it’s crucial that you make a four-patch first.
If you already made one before, it will be easier for you.
This pattern byMissouri Starwill surely receive a lot of compliments from your friends and family.
Marking the blocks is the only time consuming step!
take a stab at make this quilt project at home.
I am sure youll have fun sewing it.
Sew a 1/4 seam allowance on both sides.
Cut directly in half and press them open.
Repeat with remaining squares.

Step 2:
Place the two blocks together, right sides together with the color opposites.
Sew on the sides where they cross colors.
check that they are nested.
Cut it directly in half again and press them open.
Now, you have four patches.
Repeat the process for the other pieces.
Step 3:
Get one four patch.
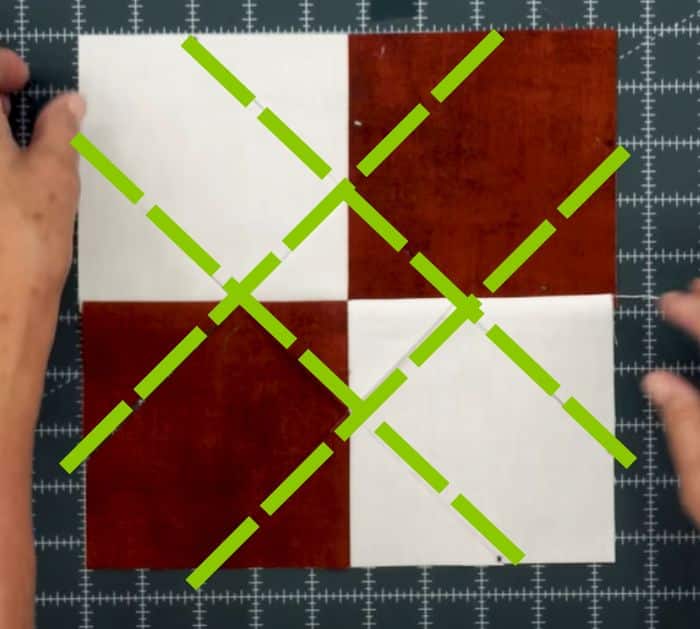
Measure 2 inches from the corner all the way around the square and mark.
Take your ruler, line it up to make the dots in opposite directions intersect, and cut it.
Repeat with the other marks.
See photo below for reference.
Step 4:
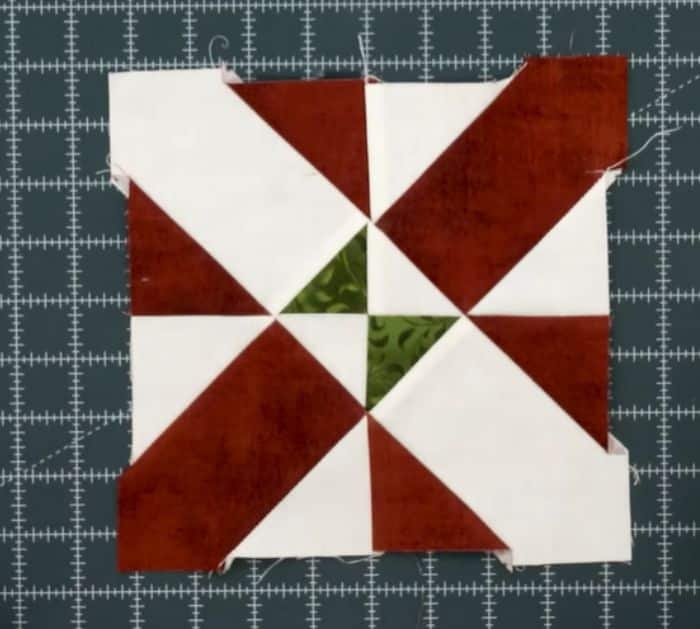
Swap the corner dark ones with the light pieces just like in the photo.
Sew the center pieces together first, then the top and bottom rows.
see to it the background is going against the color.
Sew into a block, then trim it into a square.
Step 5:
You need 9 rows with 8 blocks each for a total of 72 blocks.
One pack will make 84 blocks, so you will have extras.
Arrange them just like in the finished photo.
