Want a statement piece in your room?
Hang this DIY butterfly lantern!
I saw this onMASS Art and Craftand instantly fell in love with it.
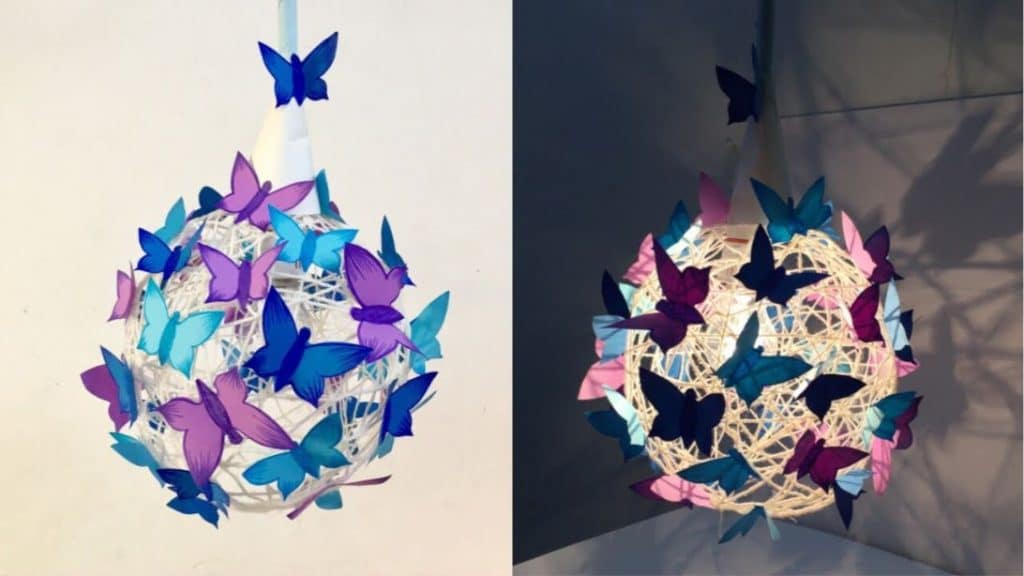
Image by MASS Art and Craft via Youtube
I knew I had to make it right away for my space.
It sure looks amazing at night, right?
Watch the video below for full instructions.
Place the tape on the bottom and trace the circle with a marker.
Step 2:
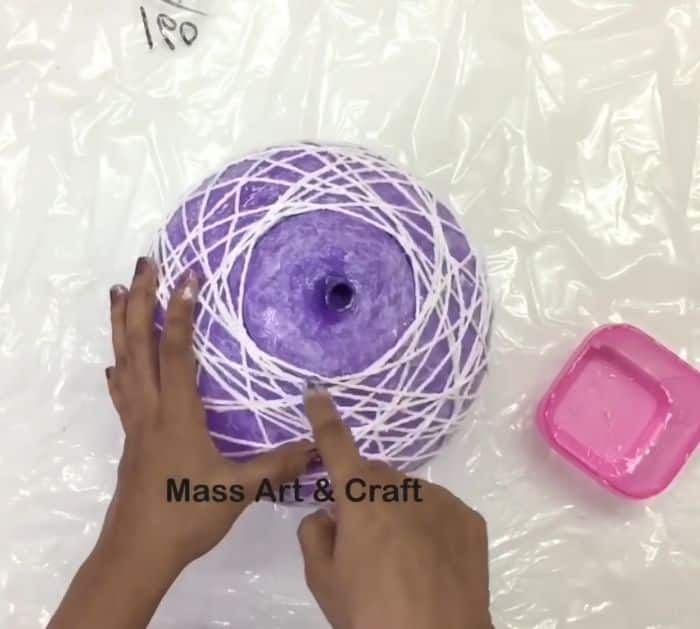
Add glue to a container and a very long strand of yarn.
Dip and ensure everything is coated with glue.
Once done, tie the end to secure.
Let it dry completely.
If your yarn doesnt cover much of the balloon, just add another layer around.
Step 4:
Poke the balloon and remove it from the yarn.
Gently bring it back to its original shape by pressing it inside using your hands.
Step 5:
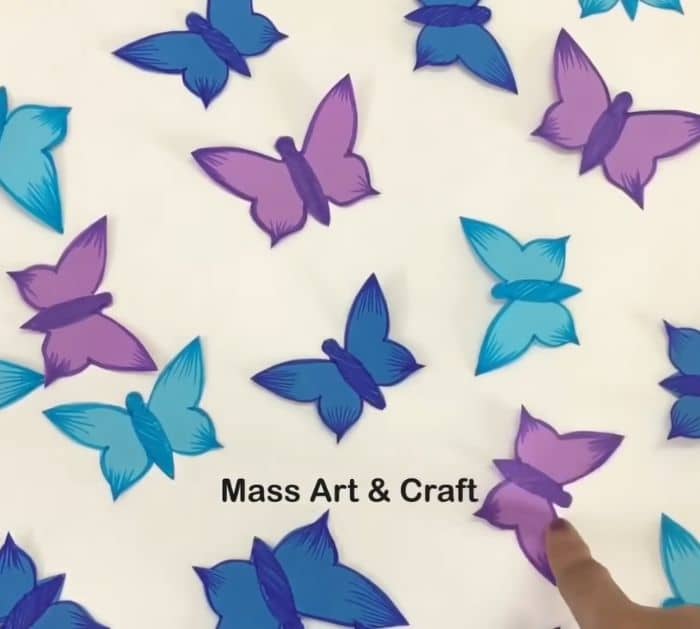
Get one of the B rectangles and fold it in half.
Draw half of the butterfly on one side and cut it out.
Add some designs just like in the photo below.
Once done, fold the wings.
Repeat with the other rectangles.
Step 6:
Make a cone using paper, and ensure that the tip is open.
Stick the cone to the lamp using super glue.
Next, roll a piece of paper and wrap it around the wire.
Step 8:
Start gluing the butterflies to the lamp.
Alternate the size and color of each one.
it’s possible for you to also add butterflies to the cord if you want.
