Stand out from the crowd wearing this statement piece.
Its lovely and colorful, the perfect accessory for this summer season.
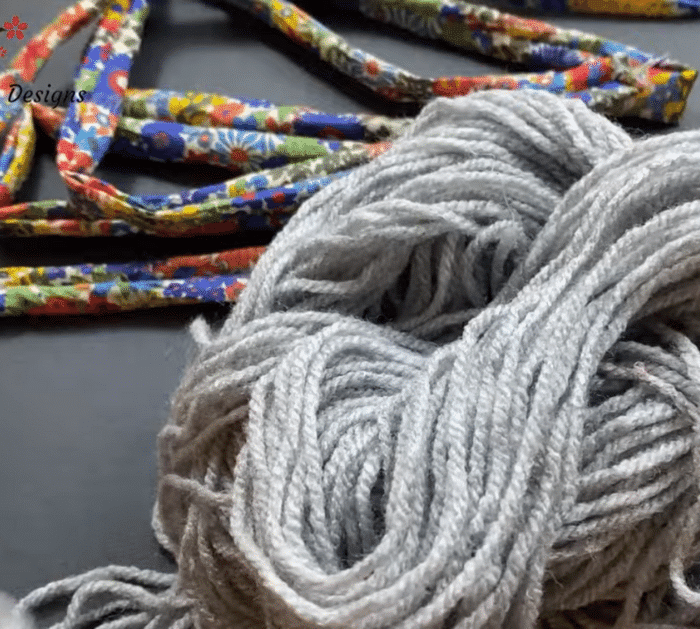
Get your fabric scraps as you will be using them for this project.
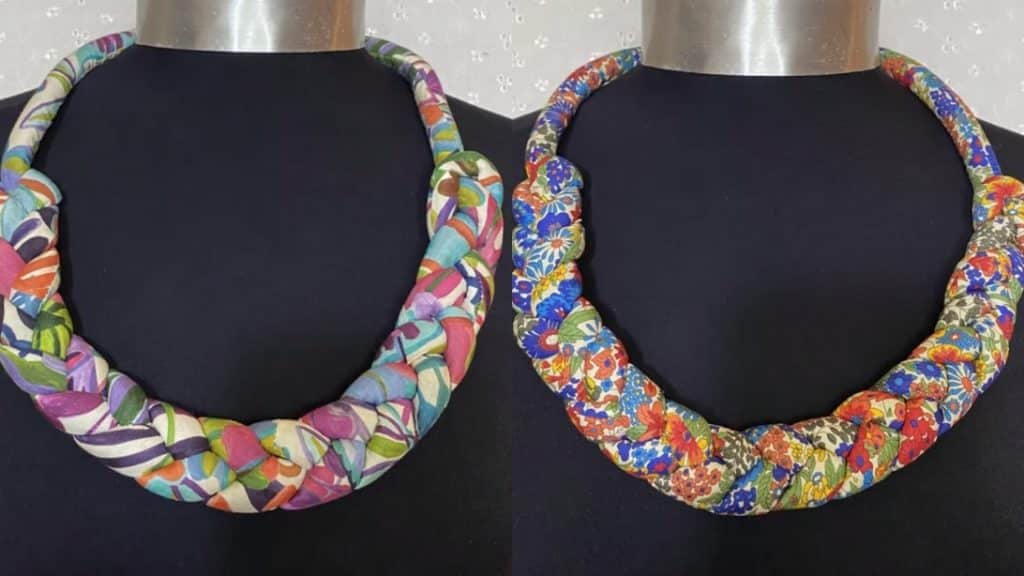
Image by: Red Blossom Designs
You will be turning them into beautiful necklaces with this DIY fabric braided necklace tutorial byRed Blossom Designs.
Its super easy and fun to make!
you’re able to try out different fabrics and be creative as you want.
Add some beads to make it more sparkly and cute!
Watch the video below for the full instructions.
Once done, pull the right side out.
Step 2:
Get a 30-strand yarn and insert it into the sewn fabric.
Then cut the excess.
Fold it in half and measure 9.8 inches from both ends and mark.
Next, fold the middle into three equal parts.
Step 3:
Do a 3 strand braid technique from the first mark until the second mark.
Pull out the yarn from one end and measure 2 inches, then cut it.
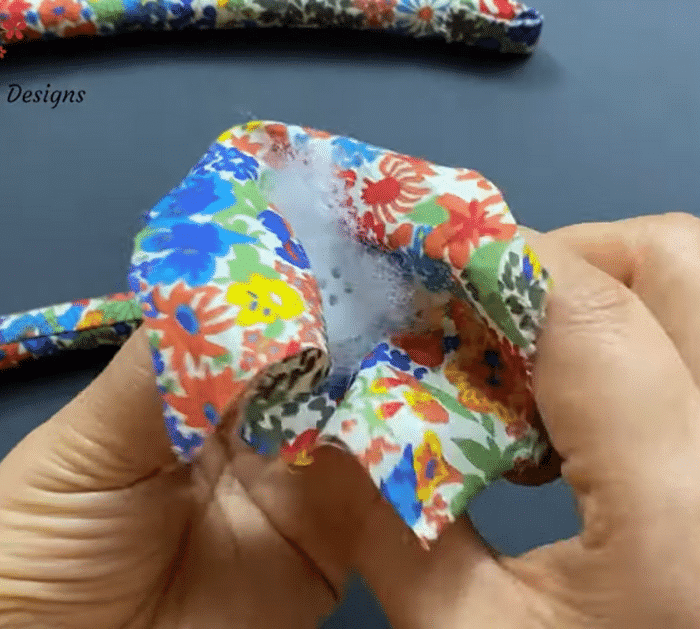
Fold the edges of the fabric inward, then fold again in half lengthwise.
Sew the fold for about an inch.
Once done, fold it then sew the edges for the hook of the button.
Get some fabric scraps, buttons, fillers, and glue.
Put some glue on the button and stick some filler on top.
Cover it with the fabric scrap and close tightly.
Once done, cut the excess fabric.
Pull out the yarn from the other end and cut 0.8 inches off.
Fold the edges inward then insert the button and secure using a needle and thread.
There you have it, a beautiful fabric statement necklace.
