Ive been loving paper crafts recently, and this hibiscus flower byAmazing Super Craftis one of my favorites.
Its perfect for this summer season.
I put them in vases and use them as decor around my house.

Image by Amazing Super Craft via Youtube
Watch the video below for full instructions.
Next, fold it again in half two times.
After that, fold the straight part toward the diagonal, then cut the excess.
Step 2:
Open it and cut a curve from corner to corner.
Step 3:
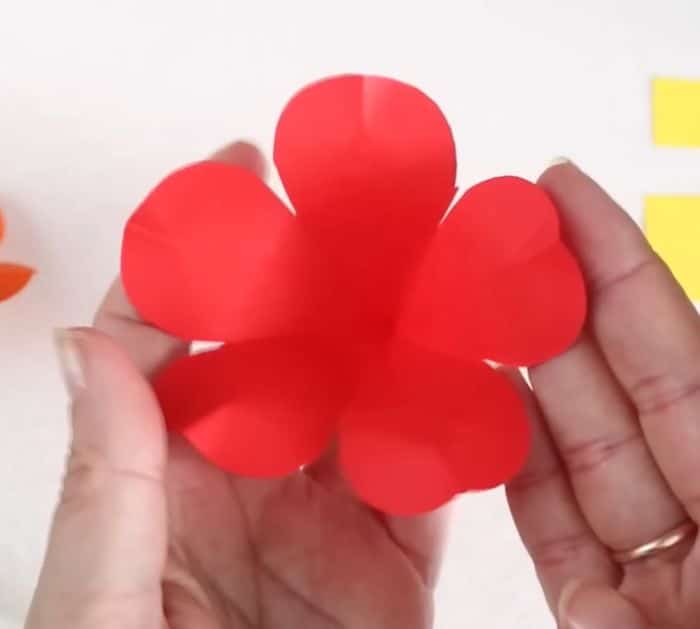
Open it and cut two of the petals.
Next, cut one petal in half just beside the petal you removed.

Add glue to the half petal and stick to the other end.
Step 4:
Curl the petals with a pencil or pen.
Fold each petal in half on the tip.
Step 5:
Get strip B and roll it.
Glue the end to secure.
Step 6:
Get strip A and draw a line on one of the long edges.
Next, cut it into thin strips from the marked edge to the crease.
Curl it with a pen or pencil.
Step 7:
Wrap the cut strip into the yellow roll.
Insert into the middle of the flower and glue.
Step 8:
Get rectangle G and wrap it around the stick and glue the end.
Cut one of the ends into four, then insert and glue the flower.
Step 9:
Get rectangle E and fold it in half diagonally.
Next, fold it two times in half.
Cut a leaf shape and open it.
Remove two of the petals, and glue the ends together.
Insert it on the stem.
Step 10:
Take rectangle F and cut it into a leaf.
After that, get square D and roll it into a stem.
Glue the stem to the leaf and then onto the stem of the flower.
