I am so in love with this Dollar Tree Christmas centerpiece decor DIY byJamies Creationson Youtube.
Isnt this beautiful and well-designed?
Only half of the ring is filled with different sizes of ornament balls which balances it out.
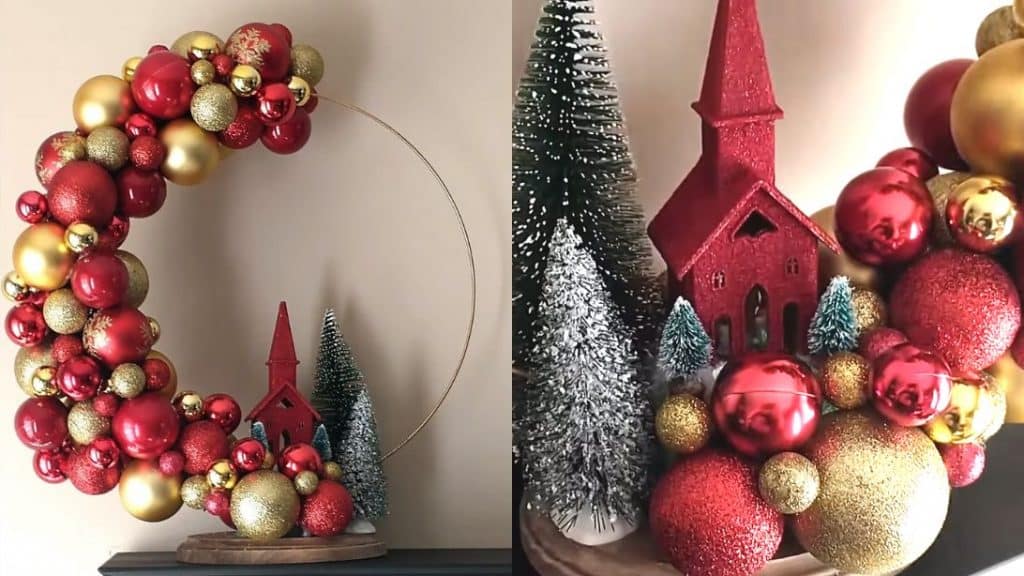
Image by Jamie’s Creations
This will surely be a statement in your space!
Watch the video below for full instructions.
Take 1 of the pieces and cut it in half again to make a 2 1/2 wide foam.
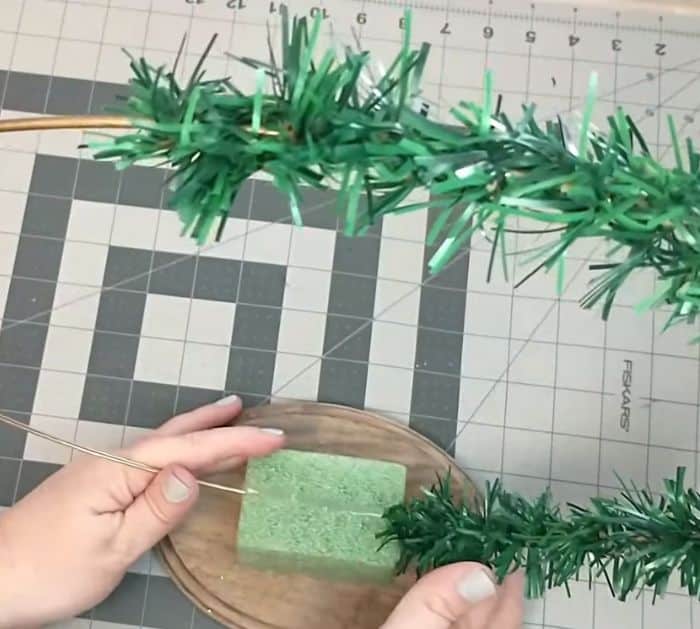
Step 2:
Glue the 2 1/2 foam onto the center of the wood piece.
Cut a 1/4 deep slit in the middle of the foam.
Add hot glue to the slit and place the ring.
Add more hot glue on the top and let it dry.
Step 3:
Wrap the garland around half of the ring until you get to the top.
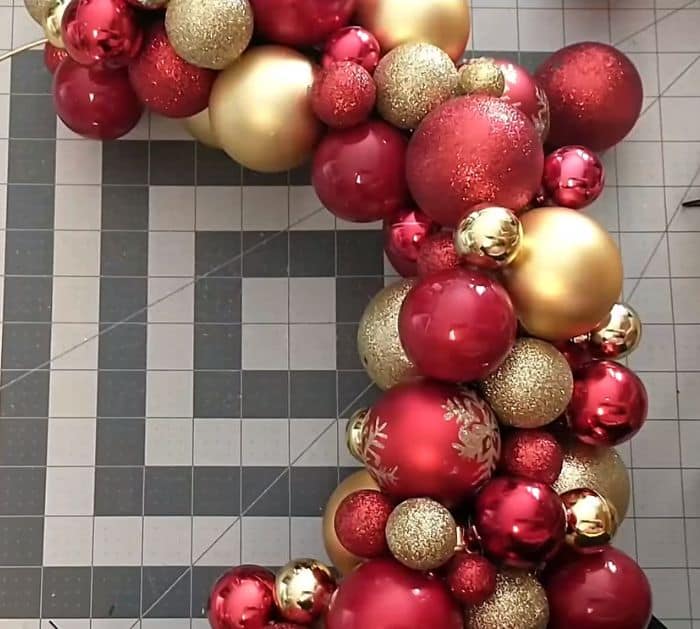
Remove the hook part of the balls.
Start gluing the small ornaments, followed by two larger ornaments to the front part of the ring.
Continue adding until you fill the whole half.
Use the filler balls for empty areas.
Once dry, paint with mod podge and sprinkle the glitter.
Stick it to the center of the foam using hot glue, then decorate it with mini trees.
Add faux snow on the base of the church.
Step 5:
Cover the base of the foam with more ball ornaments and ball fillers.
Next, glue the big trees on the side of the wood plaque.
