This is one of the craft ideas for autumn that looks intimidating but is actually easy to create!
I am sure youll love creating this awesome project.
Watch the video below for the full instructions.
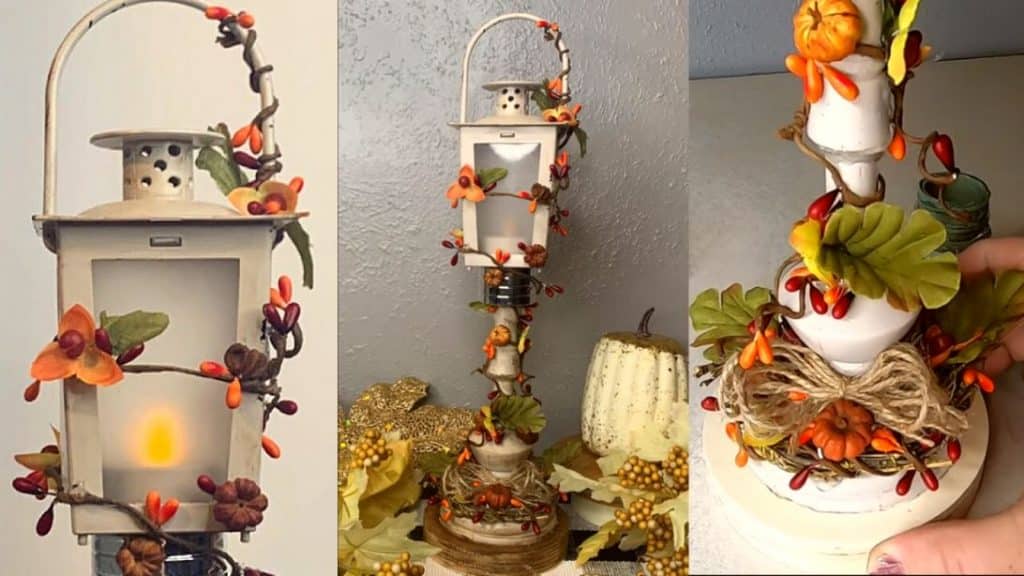
Image by: Rebecca, Stu & The Crew
Next, remove the skull from the stand.
Step 2:
Take the vellum cover and trace it on the chopping mat.
Cut it carefully using a pair of scissors.
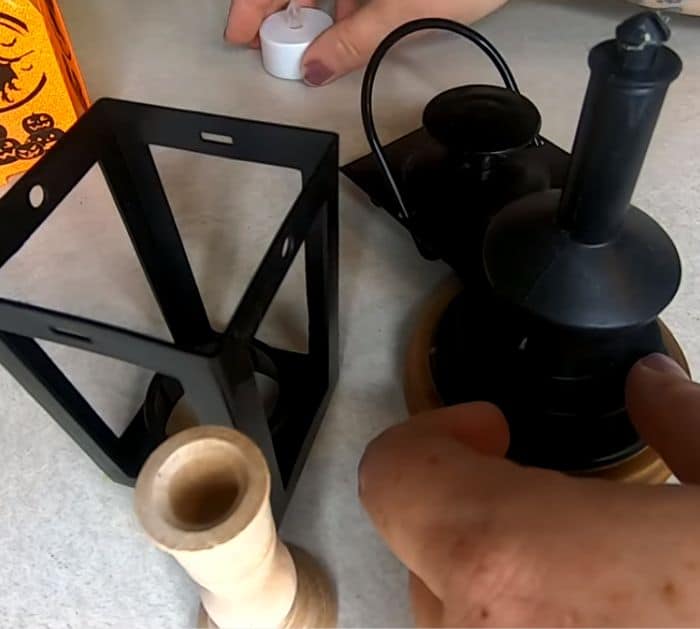
Take a straight edge and razor to make some score marks on the corners.
Just follow the pattern of the original one.
Fold it over gently to make a crease.

Add some hot glue to the ends to secure them.
Next, put the top back on.
Next, hot glue the napkin ring at the bottom of the lantern.
Step 5:
Cut the bamboo wreath apart to make a tiny one.
Wrap the floral wire around to secure.
Next, wrap the berries on the vine around the small wreath in a diagonal pattern.
Then take another one and wrap it around the lantern from the handle to the napkin ring.
Step 6:
Cut the faux leaves a little bit smaller and glue them on the vines.
Next, glue the faux flowers, seeds, and small pumpkins to the stand and vines.
Put a small twine bow at the bottom of the stand.
Glue the stand to a circle of wood and paint it with antique wax.
