Ive been seeingInTheWorkPlaces DIY ghost pumpkin a lot in my feed recently.
No wonder its getting a lot of views it is so cute and easy to make!
It might look hard to recreate but trust me, it is not.
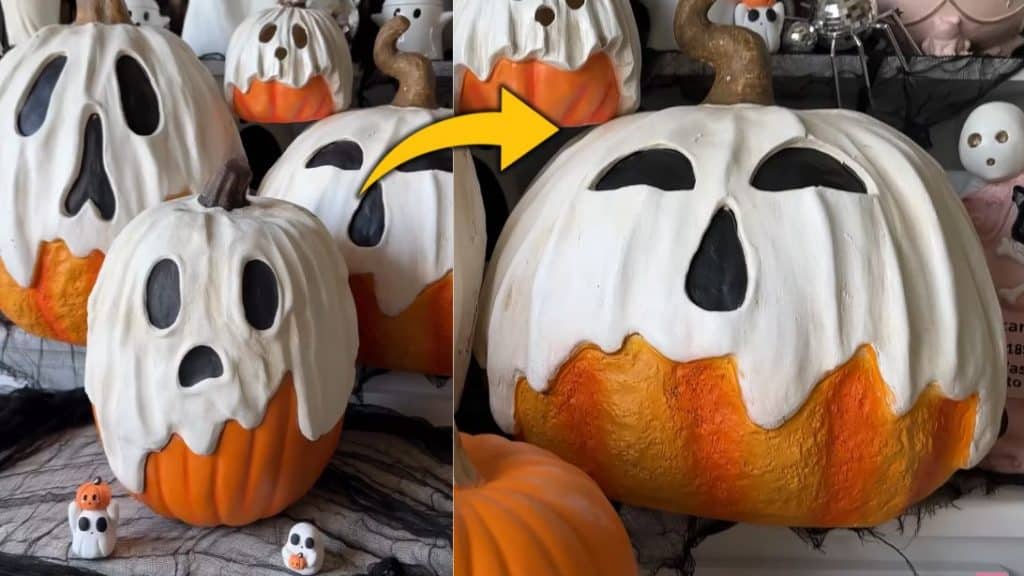
Image by InTheWorkPlace via YouTube
Youll finish this project quickly if you already worked with air dry clay.
But if you havent, do not worry!
The steps are very simple.
I absolutely love how it turned out.
I wont even think its a DIY project.
It looks like an expensive Halloween decoration it’s possible for you to get from high-end stores.
Make it this spooky season, and I bet youll get a lot of compliments.
Watch the video below for the instructions.
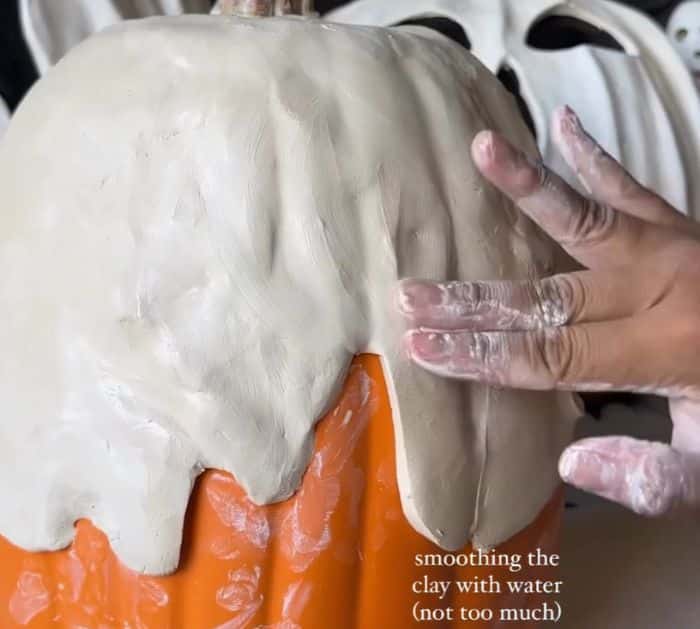
Dont make it too thin.
Using an Xacto knife cut a wavy shape.
confirm that it is not too big or too small for your pumpkin.
Step 2:
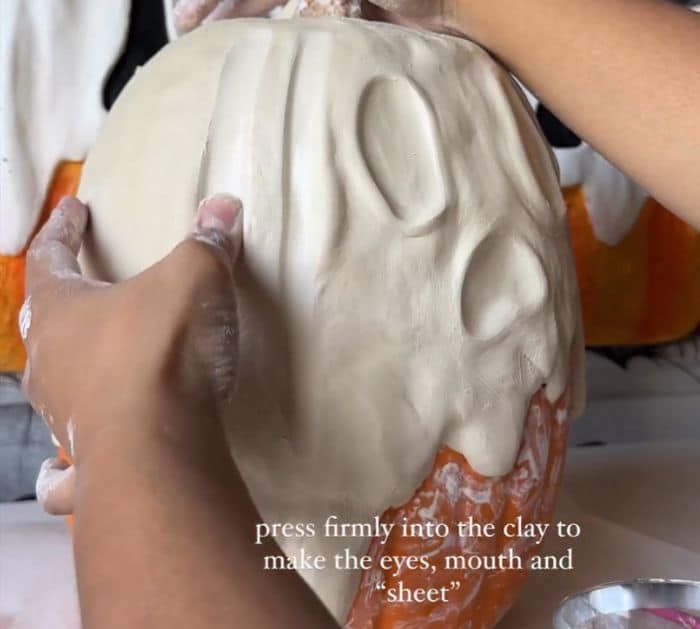
Place it over your pumpkin and press it to so it takes its shape.
Smoothen it out using water.
If you feel like some areas need more clay, go ahead and add more.
Just use water to connect it smoothly.
You want to make the drippings different from each other.
Make short and long ones.
It doesnt have to be super smooth.
Create some vertical lines as well to make it look like a cloth.
Once you are satisfied with it, let it dry.
If it cracks as it dries, you might make a paste using clay and water.
Just mix them together and place them on the cracking.
Let it dry completely.
Step 4:
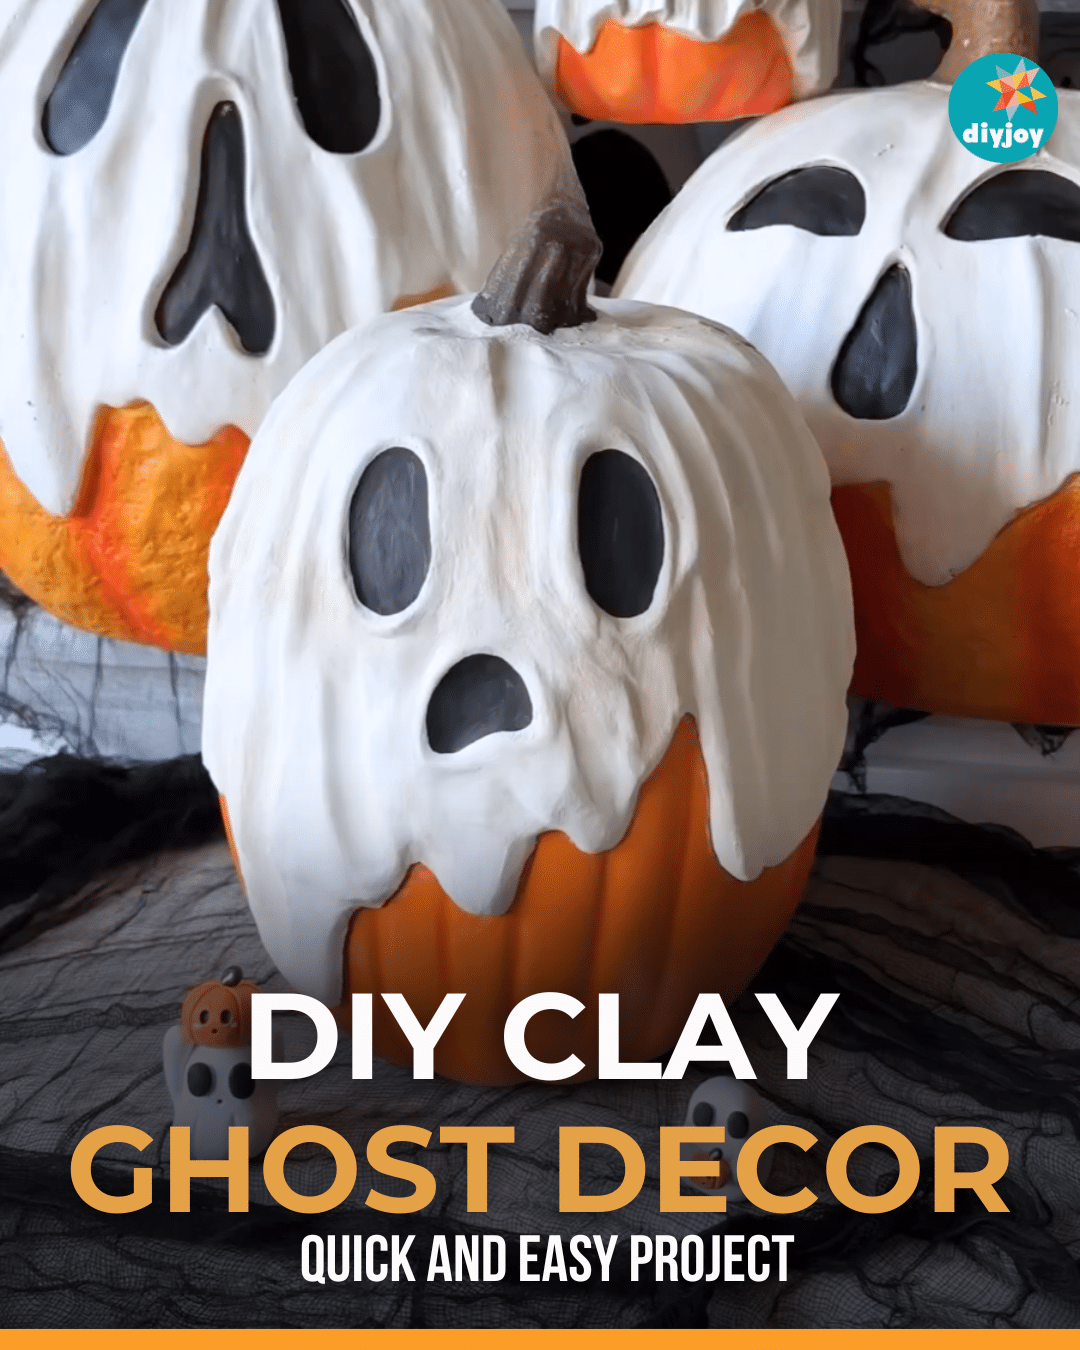
Paint the eyes and nose with black paint.
