Its a fun and clever way to display small lightweight toys.
My kids love it and Im sure toy car collectors will like this too.
Read on or watch the video below for full instructions.
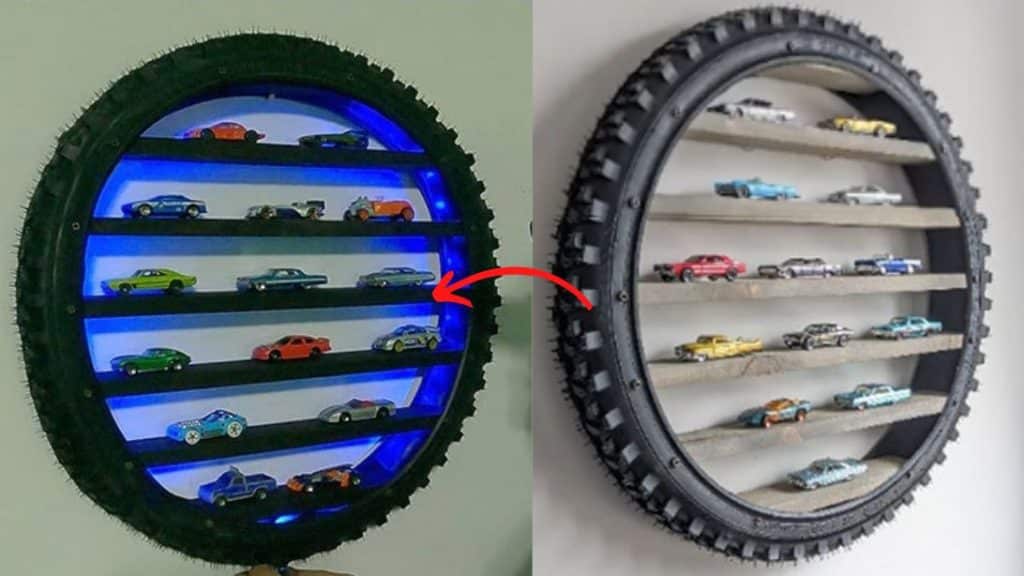
Image by Riverside Creations via Youtube
Step 2:
Place two spacers in between the 6 slats of 2 wood.
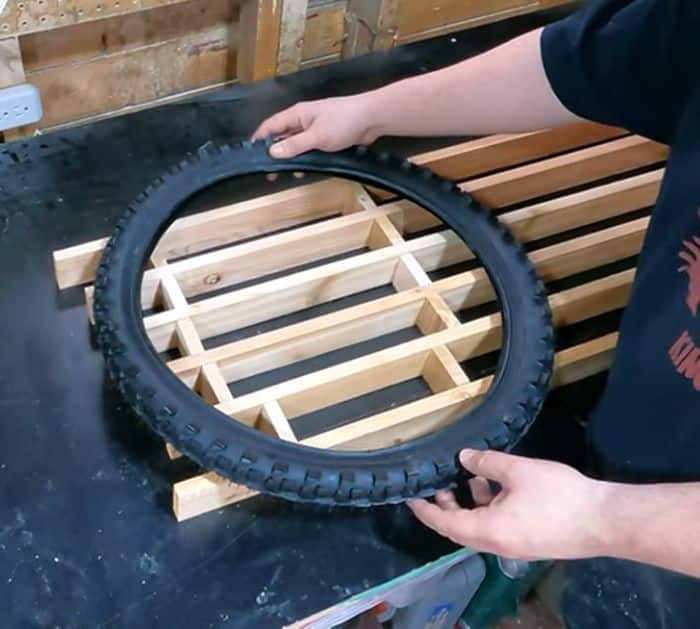
Step 3:
Take your tire and place it in position.
Step 4:
Trace the inside circle of the tire onto the wood slats.
Step 5:
Figure how far in you want the slats to be.
For this project, he used a 3 1/4 allowance.
verify to mark them on the slats.

Step 6:
Sew them on the marks using a saw and sand them really well.
Once all sides are smooth, stain them.
Step 8:
Place an LED strip around the inside of the tire.
Step 9:
Place them inside the tire with the small pieces on top and bottom.
Push the smallest piece on the bottom first, then add 2 pieces of spacers.
Push the next slats with spacers in between each piece, then screw the slats in place.
Be sure not to screw them too hard.
