I couldnt get my eyes away from this adorable dog when I first saw this online!
I knew I had to make it right away.
Gladly, I found this super easy yarn dog DIY tutorial.
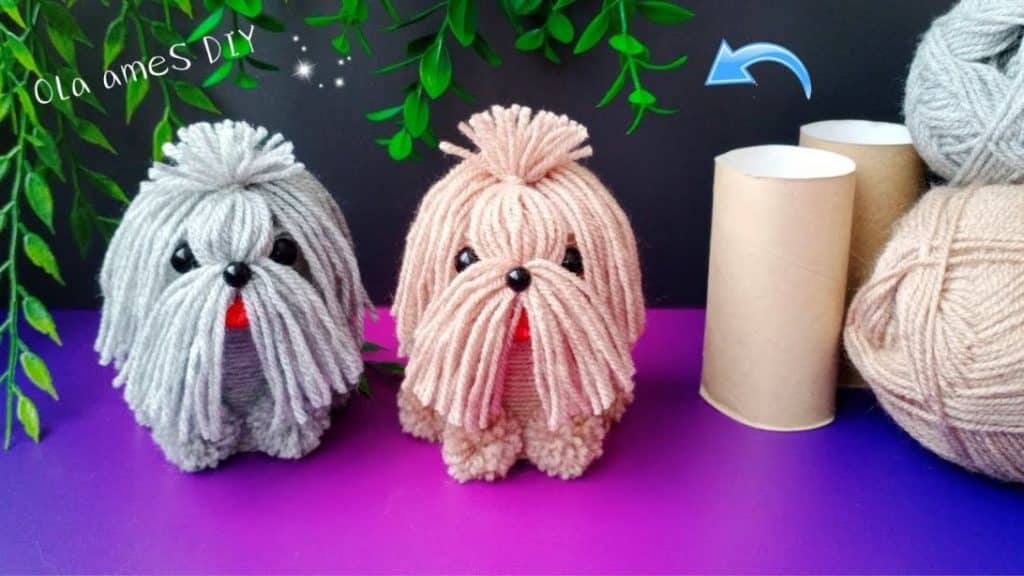
Image by Ola ameS DIY via Youtube
Step 2:
Cut the roll all around the mark.
see to it to trim to make a clean edge.
Step 3:
Take some cardboard and place it on the bottom of the roll.
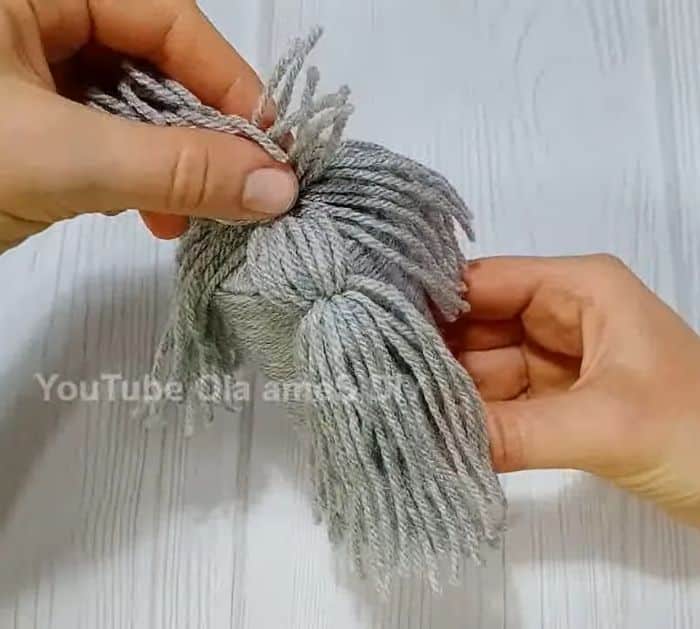
Image by Ola ameS DIY via Youtube
Trace it with a pencil and cut.
Make another piece for the top.
Step 4:
Add hot glue on the edge and stick one of the round cardboard pieces.
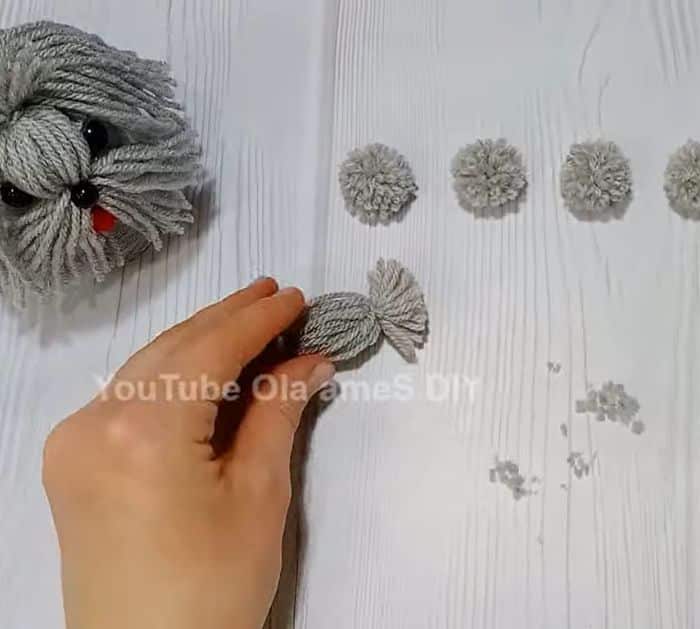
Image by Ola ameS DIY via Youtube
Wrap the yarn around, tilting the angle a little bit after each loop until its fully covered.
Add another dab of glue on the center, stick the end of the yarn, and cut it.
Add glue on the other edge of the roll and stick it in place.
Glue the ends in place.
Once done, cut the end of the yarn.
Cut a small strand and tie the loops in the center.
Cut the ends of the loops to make a lot of strands, then trim them.
Repeat the process and make another one.
Step 10:
Get a fork and a small strand of another color of yarn.
Place the small strand on the first slot.
Take the end of this yarn and loop it from the edge to the second slot 15 times.
Once done, take the small strand and tie it around the loops tightly.
Remove from the fork and trim excess yarn.
Part the bottom strands in half then glue this small round loop of yarn on the center.
Step 11:
Glue the eyes and nose.
Step 12:
Cut a small strand using the first color of yarn and set it aside.
Loop the same yarn 25 times on your index finger.
Remove it and tie it in the middle with the small strand.
Cut the loops to make the strands.
Trim to make a pompom ball.
Repeat 3 more times to make a total of 4.
Step 13:
Cut a small strand and set it aside.
Loop the yarn 20 times on your 3 fingers.
Tie the small strand in the upper 1/3 part.
Get another small strand and tie on the bottom loops.
Cut the smaller loops and trim.
This will be the tail.
Step 14:
Glue the 4 pompom balls for the feet, then lastly the tail.
